Building a simple calculator
Making a calculator that can add, subtract, multiply or divide two numbers
We want to build on the Simple HTML with Javascript lesson to make a little more complex calculator. The simple application we built in that lesson used and Add button to add the numbers entered into some input text boxes. It is possible to just add more buttons so that we can also support subtract, multiply and divide. But, let’s take a different approach and make use of a different kind of input element. So, we want to make use of a drop-down list, that would allow us to select from the four choices +, -, x and / for add, subtract, multiply and divide respectively.
Forking a StackBlitz project
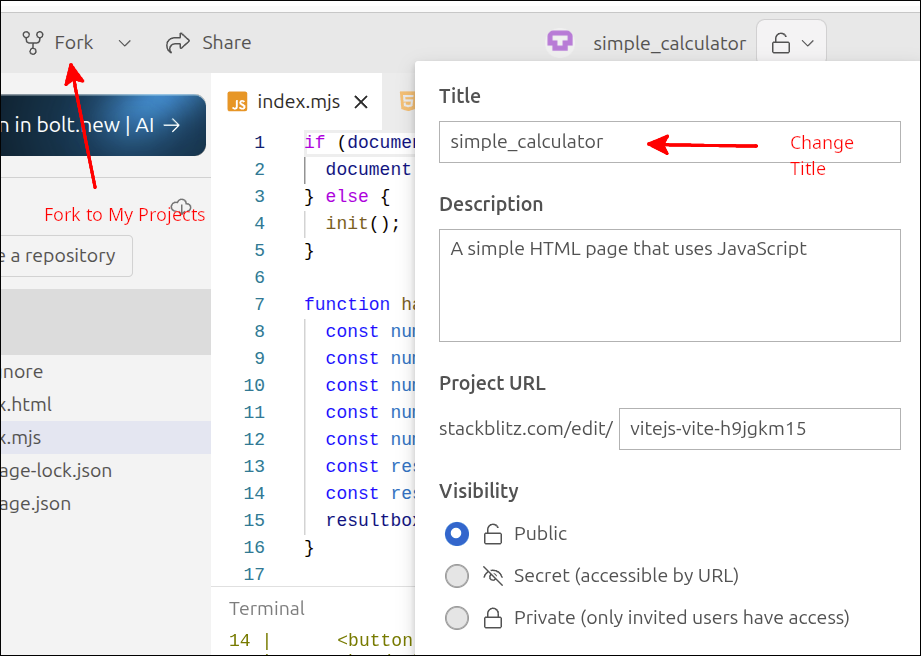
We can reuse a lot of the code we created for the Simple HTML with Javascript Sandbox. To do this, login to your account on CodeSandbox and click on the simple_html_javascript project. On the upper left side, click on the Fork dropdown. Select Fork to ⇒ My Projects. Edit the project info to change the Title to simple_calculator.
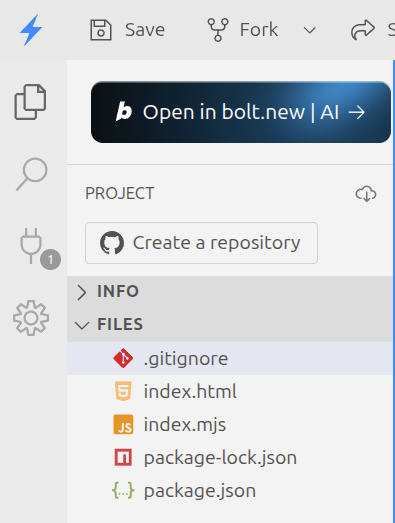
If you don’t have the project saved from the Simple HTML with Javascript lesson, you can start in the Dashboard with a New project and select the JS Vanilla template. You should change the Title to simple_calculator. Then, delete the public and src folders and add the file index.mjs. Your PROJECT files should look like this.
Starting a Vite project
For starting out locally using Vite, you can follow the commands below:
$ cd ~/Documents
$ npx degit takebayashiv-cmd/basic-vite-template simple_calculator
$ cd simple_calculator
$ npm install
$ npm run dev
Using Visual Studio Code, you can open up the ~/Documents/simple_calculator folder and start editing the files.
Changing the source code.
Here is the source code for index.html:
<!DOCTYPE html>
<html>
<head>
<title>JavaScript Sandbox</title>
<meta charset="UTF-8" />
<script src="./index.mjs" type="module"></script>
</head>
<body>
<h1>Simple Calculator</h1>
num1:
<input type="text" id="num1box" size="7" />
<select id="operator_select">
<option>+</option>
<option>-</option>
<option>*</option>
<option>/</option>
</select>
num2:
<input type="text" id="num2box" size="7" />
<button id="operator_button">Calculate</button>
<br /><br />
Result:
<input type="text" id="resultbox" size="8" />
</body>
</html>If you forked your project, the new lines shown highlighted are 10, 13-20 and 23. If you did not fork a StackBlitz project, just copy and paste the entire code to replace your index.html.
On line 10, the heading was changed to Simple Calculator. On line 13 and on line 20 is used to put spaces on both sides of the <select> element. Lines 14-19 define the <select> element. On line 14, the <select> element is given an id="operator_select" attribute. This id is important, as we will use this to select this element in the JavaScript code. Lines 15-18 define the <option> elements that make up the list of choices for the <select> drop-down list.
Line 23 changed the id attribute to "operator_button", instead of "add_button". Also, the text to be displayed on that button will be "Calculate", instead of "Add".
Making these changes will mess up the view in Preview, but that will be fixed when we make changes to the index.mjs file. Here is the modified index.mjs file:
if (document.readyState === "loading") {
  document.addEventListener("DOMContentLoaded", init);
} else {
  init();
}

function handleCalc() {
  const num1box = document.getElementById("num1box");
  const num2box = document.getElementById("num2box");
  const num1text = num1box.value;
  const num1 = Number(num1text);
  const num2 = Number(num2box.value);
  const result = num1 + num2;
  const resultbox = document.getElementById("resultbox");
  resultbox.value = result;
}

function init() {
  const operator_button = document.getElementById("operator_button");
  operator_button.addEventListener("click", handleCalc);
}
We will start with just a few changes. If you have lines at the type importing styles.css, delete those lines. The new lines are line 7 and 19-20. Line 7 changes the name of the function to handleCalc (it used to be handleAdd). We will need to change the contents of that function, but for now we will leave it alone. Line 19 changes the id of the element we are getting a reference to. So, now it looks for the element with an id="operator_button" attribute. Line 20 associates clicking on that button with the handleCalc() function.
If we run the app now, we can add num1 to num2 and display the result. The operator between num1 and num2 is ignored at this point. That is because the handleCalc() function does not even read what the user selects in the <select> element. So, now we will modify index.mjs to make use of the actual operator the user selects.
if (document.readyState === "loading") {
document.addEventListener("DOMContentLoaded", init);
} else {
init();
}
function handleCalc() {
const num1box = document.getElementById("num1box");
const num2box = document.getElementById("num2box");
const num1 = Number(num1box.value);
const num2 = Number(num2box.value);
const operator_select = document.getElementById("operator_select");
console.log(operator_select.value);
const result = num1 + num2;
const resultbox = document.getElementById("resultbox");
resultbox.value = result;
}
function init() {
const operator_button = document.getElementById("operator_button");
operator_button.addEventListener("click", handleCalc);
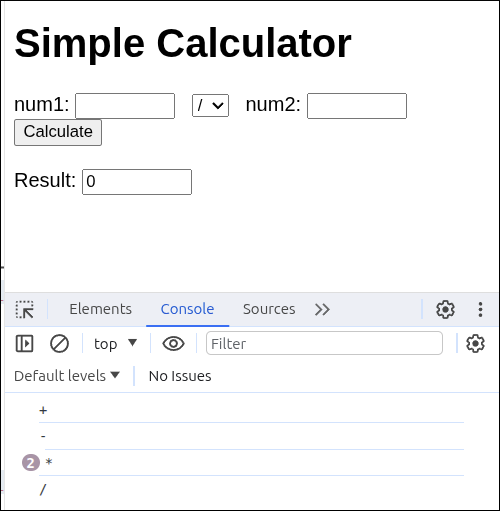
}The new lines are lines 12 and 14-15. Line 12 just changes the original code so that it obtains num1 in just one instruction just like how line 13 obtains num2. Line 14 gets a reference to the <select> element. Line 15 just prints the option selected to the console.
The following partial screen shot shows the console in the Preview area after hitting the Calculate button with the select list set to + - , or /
So, we know that we can read the selected operator. Now, we just need to be able to handle the four cases in our handleCalc() function. So, we will need a selection or conditional statement in our code. Here is the new version of index.mjs:
if (document.readyState === "loading") {
  document.addEventListener("DOMContentLoaded", init);
} else {
  init();
}

function handleCalc() {
  const num1box = document.getElementById("num1box");
  const num2box = document.getElementById("num2box");
  const num1 = Number(num1box.value);
  const num2 = Number(num2box.value);
  const operator_select = document.getElementById("operator_select");
  console.log(operator_select.value);
  const operator = operator_select.value;
  let result;
  if (operator === "+") {
    result = num1 + num2;
  } else if (operator === "-") {
    result = num1 - num2;
  } else if (operator === "*") {
    result = num1 * num2;
  } else if (operator === "/") {
    result = num1 / num2;
  }
  const resultbox = document.getElementById("resultbox");
  resultbox.value = result;
}

function init() {
  const operator_button = document.getElementById("operator_button");
  operator_button.addEventListener("click", handleCalc);
}
The new lines are 16-26. Line 16 gets the option the user selected with the <select> element and stores this in operator. Line 17 defines a variable called result. We cannot define this as a const since we cannot assign a value to it on this line. Lines 18-26 define an if statement with four cases. lines 18-20 define the first case, which executes if operator is "+". Lines 20-22 define the second case, which executes if operator is "-". Lines 22-24 define the third case, which executes if operator is "*". Lines 24-26 define the fourth case, which executes if operator is "/".
Note the use of the === (triple equal signs) used to test for equality in JavaScript. Many other languages use == (double equals) to test for equality. JavaScript uses the === when the values being compared are equal and of the same data type. In JavaScript, you can use ==, but this will return true even if the values are not the same data type. You can type in the Console to see this:
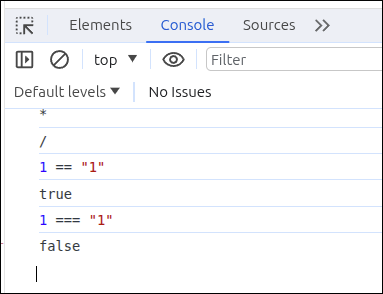
As you can see:
1 == "1"
returns true, but
1 === "1"
returns false.
This is why you should always use === when testing for equality in JavaScript.
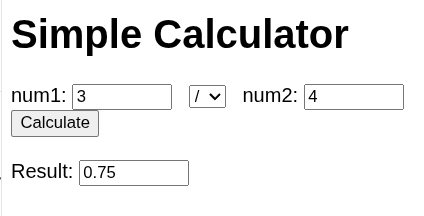
Getting back to our simple calculator, here are some screen shots showing that it works for all four operators:

So add (+) works.
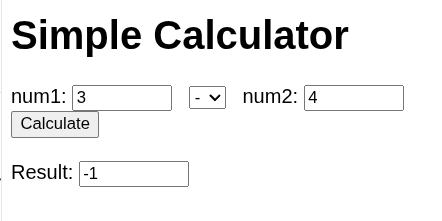
Subtract (-) works.
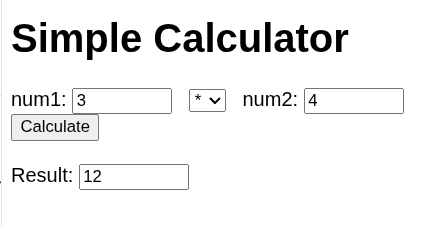
Multiply (*) works.
Summary
-
Just as before, we practiced incremental development by changing only small parts of the code before testing. We only continued after the testing showed that the code worked correctly up until that point.
-
When you need to gather user input with only a limited number of valid choices, using a <select> element is better than using an <input type="text"> element.
-
If your code has to handle several cases, you can handle that with a selection statement like an if statement. For the four cases for the value of the operator, we used a single selection statement. The use of else if is using a clause not a statement. You cannot use else if unless that clause is associated with an if statement. You can have multiple else if clauses, but only one else clause. The else clause must be the last clause.
-
In JavaScript, you should use the === to test for equality. This checks to see if the values are equal and of the same data type.