Using Starter Templates
If you use StackBlitz, when you create a sandbox or a devbox, you will use a starter template by choosing one of the available templates on the StackBlitz site. But, if you find that none of the provided templates matches what you want, you can create a custom template and use that for your starter template. If you are not working with StackBlitz, you are probably using vite to give you the same kind of experience. So, it makes sense to have a starter template that can be used with vite. That is what this guide is about.
Using a StackBlitz starter template
I created a custom StackBlitz browser template that that uses HTML and JavaScript. The JS Vanilla template is actually fine to use, but I made some changes to make a template more to my liking. If you want to use my template, start by logging into your StackBlitz account.
Keeping your StackBlitz account open, you can go to the following link in the browser: basic-vite-template.
If it takes a while to fork the template, you can just reload that URL again. This will open up a fork of that template in StackBlitz. When the project opens up, click on the drop-down list at the top so you can change the Title and Description as shown below.
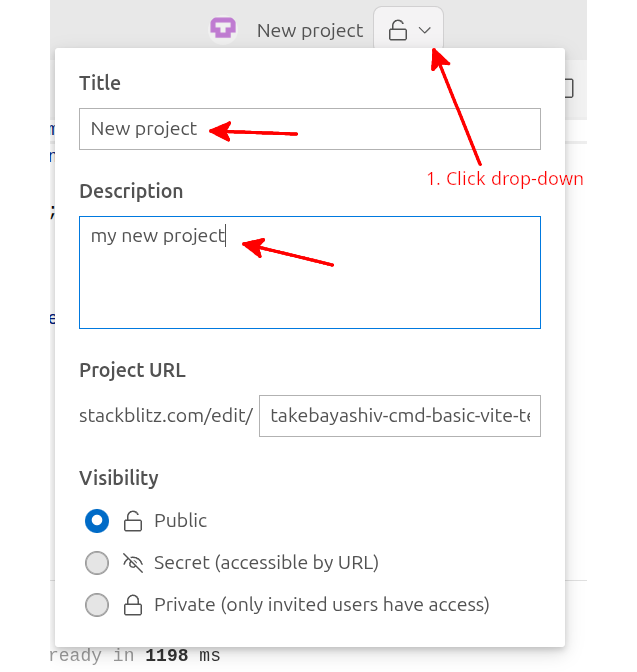
On the top menu, click on Save. Then, click on the lightning bolt symbol to the left of Save to go back to the Dashboard. You should see your new project there.
From that point forward, you can just edit your project the way that your normally do.
Using a starter template for vite
I have created a starter template for vite on one of my GitHub accounts. You need to have Node.js and npm installed on your computer. To use this template, change to your ~/Documents folder (or wherever you want to store your project). Then, you just need to run degit to start the process:
$ cd ~/Documents
$ npx degit takebayashiv-cmd/basic-vite-template newproject
Substitute the project name you want for newproject
This will take a minute or so to run. Then, run the following commands:
$ cd newproject
$ npm install
Again, substitute your project name for newproject.
To start up the vite server, make sure you are in the newproject directory and run the following:
$ cd ~/Documents/newproject
$ npm run dev
You can open up your browser to localhost:5173 to see the application running. Here is a screen shot showing the project running with the DevTools console open:
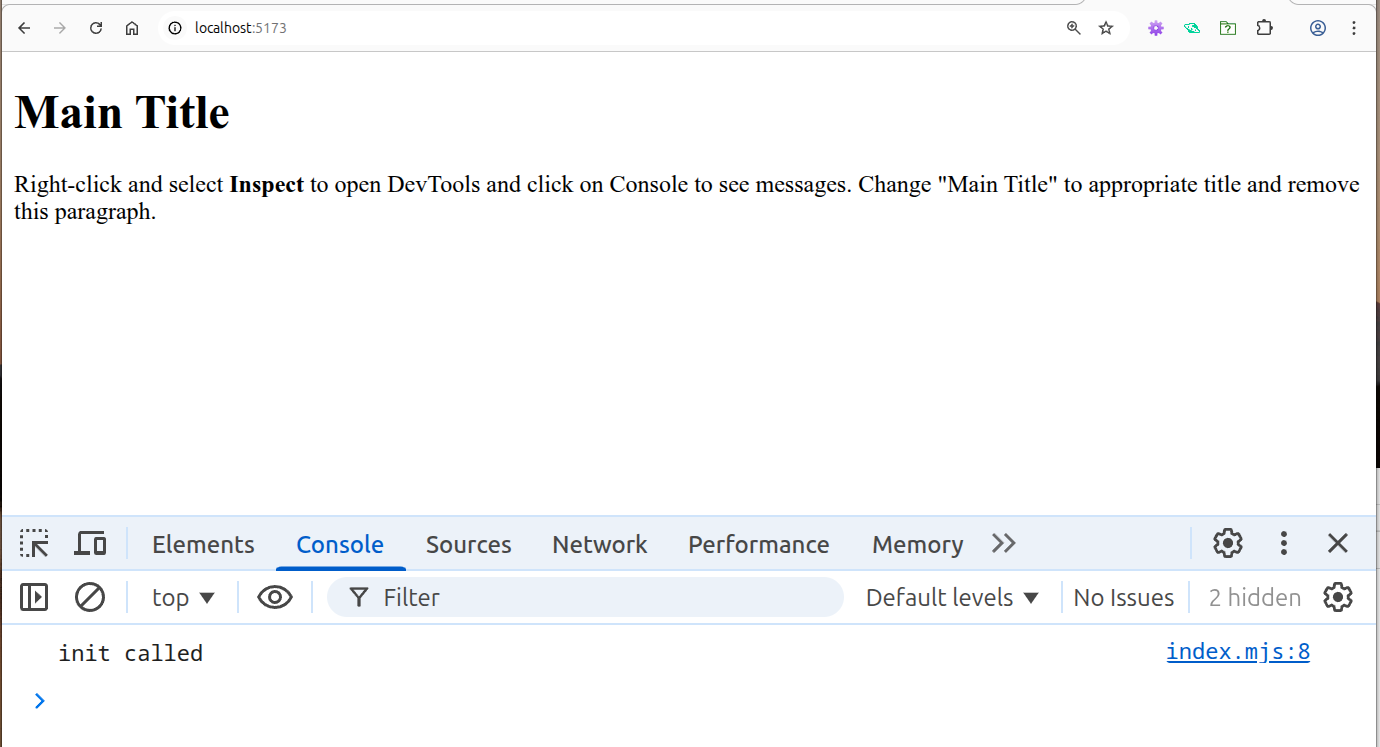
I have opened up DevTools and switched to the Console tab and refreshed the page to get this view.
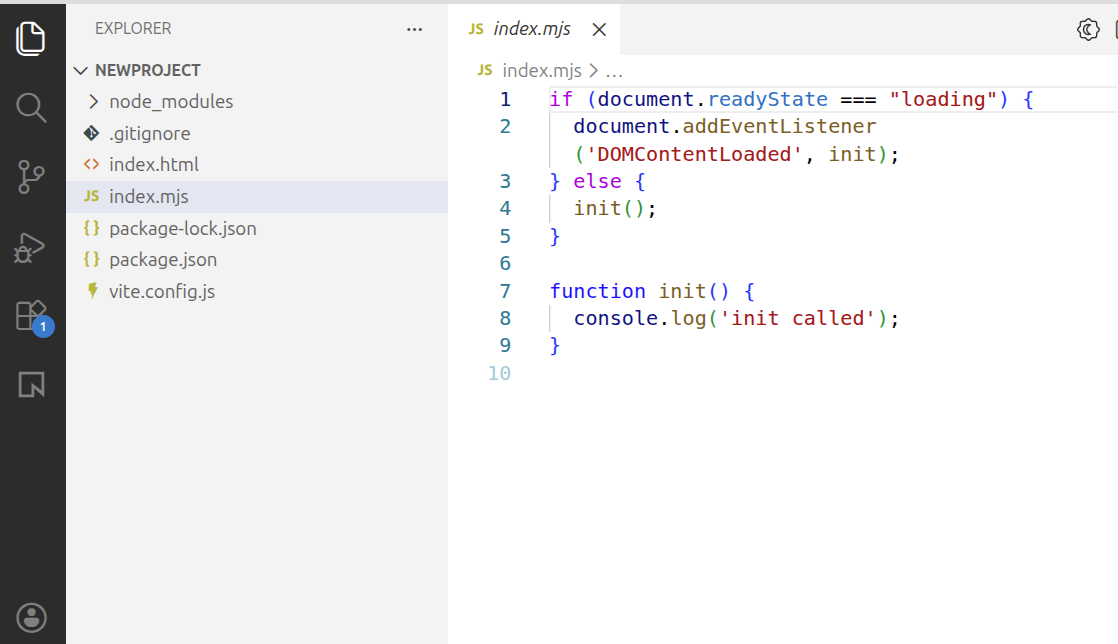
You can start up Visual Studio Code and open the newproject folder, to edit the files for this project.
Creating your own templates
The nice thing about using StackBlitz is that you can use the same template as you would use if you are developing locally. So, there is only one type of template to create.
Assume that you have a folder called myproj inside your project’s root folder. This folder contains all the files for your web project. So, for example, you might have a folder structure like this:
myproj
├── dist
│   ├── assets
│   ├── index.html
│   └── vite.svg
├── index.html
├── index.mjs
├── node_modules
│   ├── @esbuild
│   ├── esbuild
│   ├── fdir
│   ├── nanoid
│   ├── picocolors
│   ├── picomatch
│   ├── postcss
│   ├── @rollup
│   ├── rollup
│   ├── source-map-js
│   ├── tinyglobby
│   ├── @types
│   └── vite
├── package.json
├── package-lock.json
├── public
│   └── vite.svg
This is a project that is using vite and has already been built using the npm run build command. So, it contains a dist folder that contains the built files. So, what you need to do is to remove the node_modules folder and the dist folder (if the dist folder exists). You also need to remove the package-lock.json file. You really don’t need the public folder so you could remove that too unless you have static files like images that you always use.
Next, you need to add the file vite.config.js to the main folder. The contents of that file will be the following:
import { defineConfig } from 'vite';
export default defineConfig({
  base: './'
});
With these changes, the directory structure will look like this:
myproj
├── index.html
├── index.mjs
├── package.json
├── public
│   └── vite.svg
└── vite.config.js
Creating a repository on GitHub
You will need a repository on GitHub for this project. Refer to this guide: Backing up your work - Using a cloud repository GitHub. That explains how to get a GitHub account, generate SSH keys and use the Deploy keys tool to use the SSH public key you have stored on your computer. That guide will also show you how to create the remote repository on GitHub. If you already have used a SSH pub key for another one of your repositories, you must create another one.
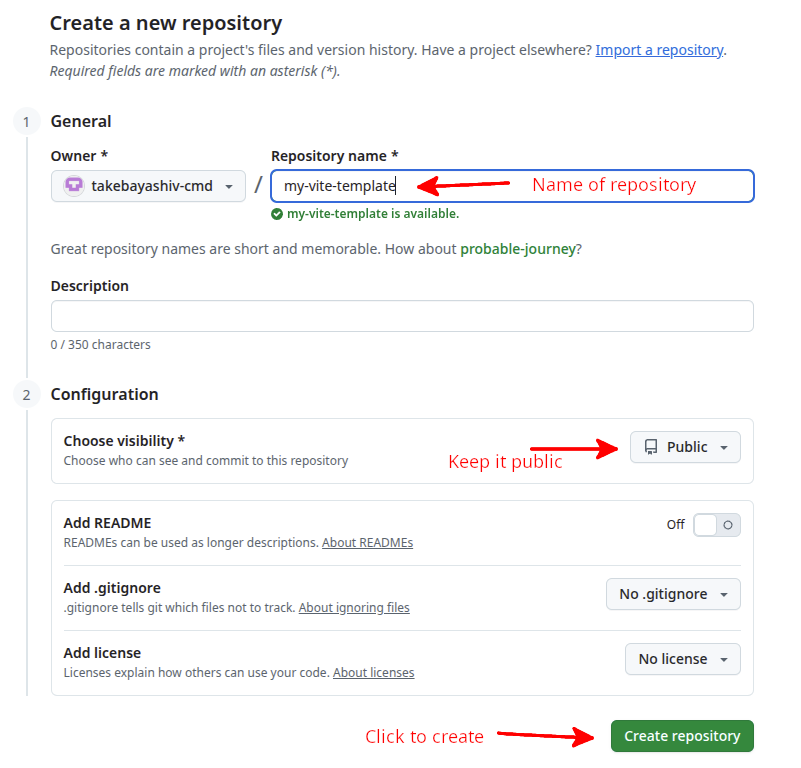
For this usage, let’s assume that you want to call this repository my-vite_template. Set the visibility to Public. Then, click on Create repository.
Follow the instructions with the above guide to go to Settings for the repository you just created, and select Deploy keys. Add deploy key by copying the pub key from your computer to the GitHub repository as shown in that above guide. Make sure that you check the write access box.
Setting up the local project directory
If you have set up the GitHub repository as in the section above, go to your local computer and change into your project directory. Execute the following commands:
$ cd ~/Documents/myproj
$ git init
$ git add .
$ git commit -m "Initial commit"
$ git branch -M main
$ git remote add origin git@github.com:<username>/my-vite-template.git
$ git push -u origin main
Substitute your GitHub username for <username>.
you should see something like this:
Enumerating objects: 9, done.
Counting objects: 100% (9/9), done.
Delta compression using up to 12 threads
Compressing objects: 100% (8/8), done.
Writing objects: 100% (9/9), 1.85 KiB | 631.00 KiB/s, done.
Total 9 (delta 0), reused 0 (delta 0), pack-reused 0
To github.com:takebayashiv-cmd/my-vite-template.git
 * [new branch]      main -> main
branch 'main' set up to track 'origin/main'.
Using the template on GitHub
You use the same commands as discussed as above: Using a starter template for vite, once your GitHub repository is set up. That is you run the following commands:
$ cd ~/Documents
$ npx degit <username>/my-vite-template newproject2
$ cd newproject2
$ npm install
$ npm run dev (to start up the vite server)
Substitute your GitHub username for <username>